Friday, December 14, 2012

Folding End Table/Counter


I've been reading Bruce Bingham's wonderful book "The Sailor's Sketchbook".  In this book Bingham describes 76 do-it-yourself ideas that just about anyone can do on their boat.  There are projects for on deck, rigging and sails, cabin projects, and so on.  The sketches in the book feature Bingham's flicka sailboat that he lived on in Mystic Connecticut for many years.  The above sketch features a folding table/counter that just about any of us could put to use in our cabin.

Oh, one more thing.  Every sketch shows Bingham's cat... and the little stowaway mouse that lived aboard.

Enjoy

Wednesday, November 21, 2012

More About Heavy Weather Sailing


More Heavy Weather Sailing

Heavy weather does not necessarily mean hurricane force winds… although a hurricane would be heavy weather in anyone’s description.  Heavy weather though has more to do with experience and seamanship skills than simply the state of the wind and water.  Inexperienced sailors and their crew might describe a day with breezes in the ten to fifteen knot range to be extreme; while more experienced skippers and crews would relish in this same wind.  Heavy weather occurs when the skipper and crew cannot control the boat any more and it seems like the wind and waves are making the boat do unexpected and unpleasant things.

One of the first unexpected and unpleasant things is when the boat suddenly heels over - - accompanied by the sound of lots of stuff inside the cabin crashing off of shelves, tables, counters, etc.  This first unexpected and unpleasant happening makes a big mess inside the boat.  It also reinforces the old sailor’s adage that everything should have its place and be in its place.  Securing the interior of the boat is one of the first things to do when heavy weather conditions are expected.  John Rousmaniere once expressed the opinion that a pound of butter or a carton of cottage cheese could become dangerous missiles if left unattended during rough weather.  I’ve never been hit by a carton of cottage cheese, but don’t want to either.  Hence, my intent to stow everything below decks when strong wind and waves are on the way.

Likewise, equipment on deck should be made ready for heavy weather too.  The jacklines should be rigged.  These are strong lines that are secured along both side decks.  The jacklines extend from the cockpit to the bow pulpit.  On Snickerdoodle, I use a length of one-inch nylon strap.  There is an eight-inch loop sewn into both ends of the strap.  I secure one end of the jackline to the port aft mooring cleat; then lead the other end forward on the port side deck and through the hole in both bow mooring cleats; then aft along the starboard side deck to the starboard aft mooring cleat – where that end is secured.  I secure each end with a mountain climbing carabiner.    The reason I like to use the one-inch nylon strap is that it lies flat on the deck and will not roll if stepped on.  Spare sheets or even stainless steel cable can also be used for jacklines… but being round, these will both roll underfoot leading to a possible swim… just what you don’t want in heavy weather conditions.

With the jacklines ready, it is easy to snap your safety harness’ tether to the jackline.  When you do this, you are effectively tethered to your boat.  This makes going forward much safer.  BTW:  My safety harness has a built-in inflatable PFD.  So, if I should go swimming, I’ll already have my life jacket on.  If you see me out sailing, you will notice that I have this safety harness/PFD on just about anytime except when the wind is very light.

The next thing to get ready is the reefing lines for the mainsail - - if these are not already rigged and ready for use.  If the reefing lines are ready (Snickerdoodle is always rigged with the mainsail reefing lines ready), inspect them to insure that you know which line to engage, and in what sequence while reefing.   Now is probably an opportune time to get the storm jib or small working jib ready to rig.  You might not need these, but it’s always good to have them close at hand just in case.  I often hoist my 135% jib sail for winds in the teens.  This sail has a fifteen-inch pendant on the tack corner to get the sail’s foot up and off the deck.  The sail won’t catch and hold water that might come aboard over the bow and offers much better visibility forward.  My 135% jib also has reef points about thirty-inches up from its foot.  Reefing this sail reduces it to about 100%... so, a nice intermediate size prior to changing down to a really smaller jib sail.  There is a block and downhaul line secured to the stem fitting that I use to pull the reef tack down to its correct height above the stem fitting.   This tack downhaul line leads back to the cockpit so that no one has to go forward to reef the jib.  A second set of jib sheets are secured to the reef clew point and run through the jib lead blocks on both sides of the boat.  I generally don’t move the lead block when I reef this sail.  The reason is that the position that is best for the sail when it is fully raised will put additional horizontal tension on the foot of the sail when it is reefed.  This horizontal tension will allow the upper third of the sail to twist off in the gusts and spill wind (reducing heeling and rounding up).


The above picture of Snickerdoodle clearly shows the two sets of reef points in the mainsail AND the reef points in my 135% jib sail.  It looks like it’s just about time to engage one or the other.

If you don’t have a roller furling jib, you might consider sending a working jib (110% to 135%) to your favorite sail loft this winter and asking them to add reef points in that sail for you.  This should cost around $100 to $150.  It’s cheap insurance for breezy days.

What are the signs that it’s time to reef the main and/or change down the jib?  Of course the old sailor’s saying, “If you think it might be time to reef, it is.” is a pretty good saying.  Some people say, “If you think it might be time to reef, it WAS - - thirty minutes ago.”  But what are the things that should clew you in that it’s time to reef the main and/or shorten the jib?  One sure sign is if you see other sailboats with their mainsails already reefed and/or they are flying small jibs.  Another sign is if there are a lot of whitecap waves… especially to windward (take another look at the first photo).  A third sign is that you and/OR your crew are uncomfortable with the angle of heel… especially in the gusts.  Also, if you and/or your crew are getting fatigued, cold, or sick.  Along with this, it seems like the gusts are coming more frequently.  Of course, if the boat is uncontrollable or difficult to steer, it’s time to reef the main and/or shorten the jib.  Certainly, if you are digging in the lee rail and washing the windows, it was time a while ago.  A really effective clew is to watch the sailboats upwind from you.  If you see them with their rails down and at extreme angles of heel, it’s time NOW to reef your boat and/or shorten the jib… before the strong winds reach your boat.

As you reef the main and/or shorten the jib, remember that it is best if you can keep a balance between the mainsail and the jib.  It is important to keep the sail's center of effort at about the same place relative to the boat's center of lateral plane (effectively the keel).  Keeping things balanced between the mainsail and jib will give the tiller the right feel and make the boat much easier to steer - - even in the gusts.

What’s the question of the day?  When was the last time that you practiced reefing the mainsail and practiced changing down to a smaller jib sail on a nice day with breezes in the five to ten range?  This exercise will train you and your crew to know what to do, how to do it, and to be ready when the wind pipes up.

What is the second question of the day?  When was the last time you jumped in the water wearing your inflatable PFD to make sure that the life jacket actually inflated?  Those little CO2 cartages are pretty inexpensive.  So, once a year or so, make sure that the PFD will really work......


Thursday, November 15, 2012

Torqeedo Update


Torqeedo Update

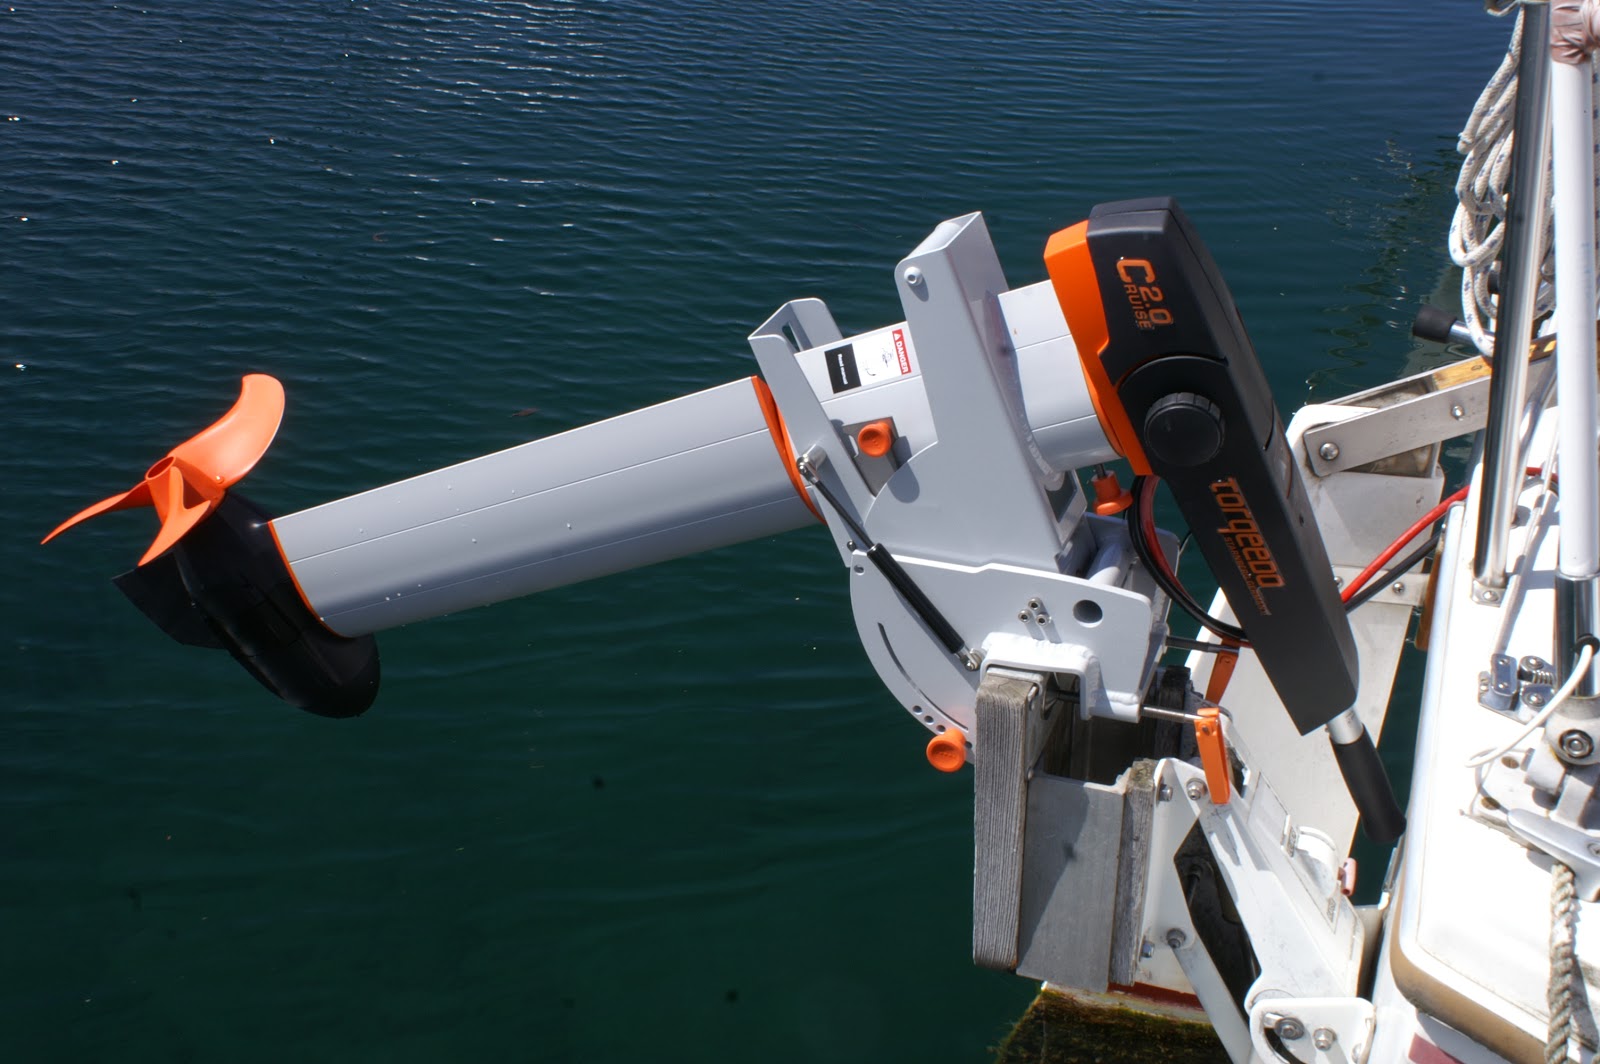
Snickerdoodle is winterized and I’m officially “on-the-beach” till next spring.  Oh, my……  One of the really nice things with this year’s winterizing was simply moving the Torqeedo from the outboard bracket to inside the main cabin.  At about forty pounds, this was easily done.  I didn’t have to worry about such things as “fogging oil”, lubing the lower unit, changing crankcase oil, “Stabil” in the gasoline tank, et al……  I put the starboard side settee cushion on edge in the V-berth, and moved the Torqeedo’s two twelve-volt batteries inside the main cabin to the starboard side settee.  With shore power keeping the cabin temperature above freezing, this is ideal for both the motor and the batteries.


After a season with the Torqeedo, how do I feel about the whole “adventure”?  For a lot of reasons, this was the right decision for Snickerdoodle.   While the Torqeedo is a bit less powerful than the previous engine -  Mercury 8hp outboard, it is more than adequate for 95% of the motor usage for this past season.  And, electrical consumption for day sailing, and short trips of say 20 miles round-trip, was easily handled by the two twelve-volt deep-cycle batteries.  The dedicated “smart” charger can recharge the batteries in just a couple hours.

Everyone loves the quiet of the Torqeedo.  Some folks have started calling the motor “stealth”.  Even at high rpms, the motor only makes a humming sound.

What was the biggest problem with the Torqeedo?  My choice of motors was the Torqeedo 2.0 long shaft, tiller version.  The long shaft is in keeping with outboard engines needs on a Catalina 25.  Propellers on short shaft engines don’t allow for the prop to be deep enough in the water on “choppy” days.  I chose the tiller version because I like to be able to set the propeller angle (relative to the boat’s centerline).  This helps balance the rudder’s tiller when in forward and still allows me to angle the motor when I’m backing up while getting out of the slip.  The Torqeedo 2.0 tiller version has an LED which shows available battery voltage as soon as the battery master switch is closed.  A 100% charge will show about 26 volts.  As the motor is used, the battery charge is depleted.  The LED shows 24 volts, 23.5 volts, etc. as the charge is used.  So, this LED is sort of like the fuel gauge on the fuel tank.  The LED shows what’s left.  The problem is that (just like a gasoline engine) the higher the motor rpms, the faster the battery charge is used up.  Unlike a gasoline engine though, the usage curve is not a straight line.  Rather, the curve accelerates as the rpms increase.  This makes it difficult to estimate how much longer the batteries will last and provide enough voltage to run the motor.  BTW: the owner’s manual says that 18 volts is minimum voltage to run the motor.

Interestingly, the Torqeedo 2.0 cruise model has a remote throttle instead of having the throttle as part of the tiller (like mine).  The remote throttle can be placed anywhere in the boat up to ten feet away from the motor.  The remote throttle also has an LED.  But this LED is four times larger and has much more information.  The remote throttle has a built-in GPS receiver.  So, the remote throttle’s LED shows: battery charge (volts); remaining range at current speed; speed; and input power consumption in watts.  This remote LED gives all of the critical information needed to determine whether the batteries can get the boat to the intended destination at the present speed.  Just what I would really like to have.  AND, HORRAY…… I just learned that this remote throttle can be linked to my motor.  Guess what’s already on my “Santa” list???????

When we went on our “sail-around-the-lake” in August, there was a mix of no-wind motoring and plenty of wind sailing.  The longest no-wind day was on Saturday when we motored all the way from Hope at the north end of Lake Pend Oreille to Button Hook Cove at the extreme southwest end of the lake.  The total distance traveled that day was 23.8 nautical miles.  I kept the boat’s speed at 3 knots.  The LED read the following:
0930  25.0 volts   as we left Hope;  1130   24.0 volts  (1 volt used in two hours); 
1230   23.7 volts  (.3 volts used in an hour);  1330   23.5 volts  (.2 volts used in an hour);  1430   23.3 volts  (.2 volts used in an hour);  1530   23.0 volts  (.3 volts used in an hour);  1430   22.7 volts  (.3 volts used in an hour);  1730   22.4 volts  (.3 volts used in an hour)
The boat speed during this day varied with any light breeze.  If the breeze was from ahead, the speed would diminish to as slow as 2.7 knots.  If the breeze was from behind, the speed might increase to 3.2 knots.
Using a Klein multi-meter to measure amperage though, things get interesting.  Here’s what I found at different speeds:
1.5 knots speed  =  1.5 amps usage;  2.0 knots speed  =  3 amps usage;  2.5 knots speed = 8 amps usage;  3.0 knots speed  =  10 amps usage;  then the rpms start using more and more amps……  3.5 knots speed  =  18 amps usage;  4.0 knots  =  36 amps usage;  4.5 knots speed  =  41.5 amps usage;  and at 5 knots speed  =  68 amps usage.

The total amp hour rating on the batteries is 110 amps.  So, at 5 knots – using 68 amps /hour – there is about a 1.5 hour charge - - equaling about  7.5 nautical miles.  I don’t plan on many days or very many miles at 5 knots……

In addition to the dedicated deep-cycle battery bank for the Torqeedo, Snickerdoodle also has two 12-volt deep-cycle batteries for the “house” batteries - - to power the VHF radio, depth sounder, interior and running lights, etc.  I purchased the extra-long power cord in addition to the power cord that came with the motor.  With this extra-long power cord, I can connect the “house” batteries in a series to power the Torqeedo in a pinch.  At 85 amp/hour rating – these two “house” batteries should be able to get us home from just about any place on the lake.
All-in-all, was this a good purchase?  And, more importantly, would I make the same purchase decision again knowing what I know now?  The answer is a resounding YES to both.  And, I’d have purchased the 2.0 cruise remote throttle too…… right from the start.


Sunday, October 14, 2012

Heaving To

Heaving To

          Heaving To is one of those sailing skills that many have heard about, but few have practiced.  It is a skill that has many benefits.  Here are just a few of the great reasons to know how to heave to:
1.     If you’re sailing single-handed, you can take a break from steering without dousing the sails.
2.    You can also fix and eat lunch, take a nap, go to the head, change clothes, etc – all with the sails still up, but the boat Hove To.
3.    Heaving To makes fixing and repairing things go quickly and easier.
4.    Reefing the mainsail single handed or short handed goes easier if you’re Hove To.
5.    You can plot your position on the chart without having the boat move significantly while you’re doing this basic navigational chore.

          So, what is Heaving To?  Simply it is adjusting the jib sail so that the jib is back-winded while the mainsail is sheeted out to about a beam reach setting.  One way to do this would be to release the loaded jib sheet while sailing and pull the jib’s clew to windward with the windward jib sheet.  This is quite a bit of work if there’s too much breeze blowing.

          An easier way to Heave To is to simply tack the boat without releasing the old loaded jib sheet.  As the boat comes through the eye of the wind, stop the boat’s turn by moving the tiller to leeward and ease the mainsheet.  As the boat comes to a stop, you’ll notice that your boat will perform sort of a “falling leaf” motion on the wind and waves with first the jib backing and pushing the bow away from the wind and then the main filling and the boat rounding up.  Adjusting the tiller or wheel to help the boat round up will complete Heaving To, and you will jog along on the waves and wind at about one knot or so with very kindly boat motion.

         Practice Heaving To on nice days with 5 to 10 knots of breeze.  It’ll only take a couple tries to figure everything out.  Then keep this maneuver in mind for those situations where you want to stop steering and there’s no one else who really wants to steer.


Halyard Sheaves

Masthead Halyard Sheaves

Many sailboat manufacturers supply their boats with plastic sheaves at the masthead for both mainsail and jib sail halyards.  These plastic sheaves always wear out eventually and the edges start to chip away.  The photo on the right above shows one of my original halyard sheaves after about fifteen years of use.  Snickerdoodle has four of these sheaves at the top of the mast for the halyards.  My first notice that there was a problem was when I had great difficulty trying to raise my jib sail one day.  The halyard had "jumped" off of the sheave and was jammed between the side of the sheave and the mast cap fitting.

My solution was to have new bronze sheaves made by a machine shop to the same dimensions as the original sheaves (picture on the left above).  I believe that the bronze sheaves will probably outlast anything else on Snickerdoodle.

When was the last time you took a good look at your halyard sheaves?  If they are plastic like mine were, it might be time now as part of your winter layup.

Friday, September 21, 2012

Check That Standing Rigging

Inspect Your Standing Rigging

When was the last time you really inspected your boat’s standing rigging?  The mast, stays, shrouds, spreaders, et al???  If you are like most sailors, it’s probably been a while.  So, here’s a few thoughts:


Spreaders – I see quite a few boats where the spreaders (which give mechanical advantage to the upper shrouds) are set up at the wrong angle to the shroud.  To work properly, the spreader should “feel” compression only.  The way to make sure that your spreaders are in compression is to make sure that the spreaders bisect the angle that the upper shroud makes as it goes from deck to high up on the mast.  If the upper shroud’s angle at the spreader tip is 160 degrees, the angle on each side of the spreader (above and below the spreader) should be 80 degrees on both sides.  If there is a difference between the angle below the spreader and the angle above the spreader, the spreader experiences compression on one side and extension on the other side.  The spreader is trying to bend.  If your boat experiences a sudden gust of wind or pounds down hard off of a wave, the difference between the compression half and the extension half of the spreader can cause the spreader to break.  This almost always ends up with a catastrophic mast failure and the boat slowing down suddenly.  Next time you are at the boat, inspect the angles on the upper shrouds at the spreader tips.

Elongated Holes in Tangs and Chain Plates – Over the years, your mast and the standing rigging move.  Loose rigs move more than tight rigs… but, all rigs move.  The movement causes friction and wear in the fittings.  Most stays and shrouds are secured to the mast tangs and to the deck chain plates with clevis pins which (when the boat is new) fit snuggly into holes in the tangs and chain plates (and the associated forks, eyes and toggles).  Over the years, the mast and rig movement “work” these fittings and ultimately the holes become elongated.  The elongated holes represent less material in the fitting – making the fitting become weaker and weaker as time goes along.  When you inspect your standing rigging, make sure that you loosen each shroud and stay (separately) by taking the clevis pin out of each terminal (top and bottom of the shroud and/or stay) and look carefully at the holes.  If the holes appear to be oval, or in any way not round, the fitting is suspect and should be replaced.  Of course, it should go without saying that the proper size of clevis pin should always be used.  Don’t put a 3/16” clevis pin in a quarter inch hole.

Clevis Pins – Just like with the holes in the shroud and stay fittings, the clevis pins can also wear.  If the clevis pin is not round, it should be replaced.  I remember inspecting the halyard sheaves in a mast cap on a sailboat once.  There were two quarter inch clevis pins about three inches long which acted as the axels for the halyard sheaves.  The boat owner was replacing the old plastic sheaves which were deteriorating with bronze sheaves that had been made at a machine shop.  Pulling the clevis pins out of the mast cap was a bit difficult because – over the years – the loading from the halyards had bent both clevis pins quite a bit.  To get the pins out, we had to use a drift punch and hammer.

Cotter Pins – The clevis pins are generally secured to fitting by using either a split ring or a cotter pin.  If your boat has cotter pins, they should be cut just a little longer than the diameter of the clevis pin.  Then, the cotter pin should be bent open equally to an angel of about ten degrees for each side.  Doing this makes removal of the cotter pin in the future go much more easily.

Shrouds and Stays – These days most sailboats have stainless steel wire rope for the shrouds and stays.  When you inspect the standing rig, take a paper towel and “run” the towel up and down each shroud and stay.  If one of the little wires that make up the shroud or stay has broken, the broken end (sometimes called a meat hook) will snag the towel instead of your hand.  Any shroud or stay with a broken wire, the shroud or stay should be immediately replaced.

Turnbuckles and Swaged Fittings – Most sailboats use swaged fittings at the ends of the shrouds and stays.  The swaged fitting is held to the wire with compression.  The fitting might be a fork, an eye, or a threaded bolt.  If you live in a part of the country where there is a real winter season, water from snow and rain can get in between the wire rope and the fitting.  When this water freezes, the fitting can crack.  Of course, the wire rope is no longer held securely.  At the very least, the fitting needs to be replaced.  Many of us will replace the whole shroud or stay.  When you are inspecting the fittings, also take a close look at all of the turnbuckles.  “Open” turnbuckles are easier to inspect than “barrel” style turnbuckles.  Look for cracks and corrosion.  One other type of corrosion that can occur on turnbuckles is galling between the threads on the bolts and the turnbuckle itself.  This galling often makes it impossible to increase or decrease the load on the rig.  Simply turning the turnbuckle one or two turns in each direction will show whether the fitting has galling.  If so, clean the turnbuckle and bolts thoroughly and lubricate the threads with an anti-seize lube when you reassemble the turnbuckle.  Don’t forget to “lock” the turnbuckle when the rig is tuned by securing a wire through the bolt ends to prevent the turnbuckle from “backing out”.

It is probably best to carefully inspect your standing rig annually as part of your normal maintenance schedule.  If your standing rig has not been thoroughly inspected for several years (or you don’t know if it ever has been inspected), the time for the inspection is NOW!!!!  Don’t delay.  Remember, if your mast falls down, you will be the “talk of the dock” for years……