Tune Your Standing Rigging.
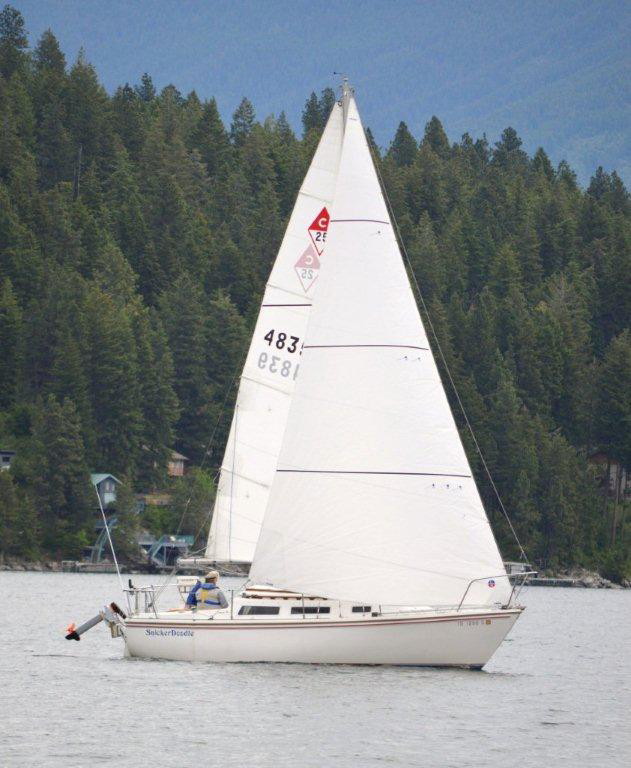
Recently – on a gusty and windy day – I observed many boats
with roller furling jib sails showing their jib and forestays sagging
significantly each time a gust of wind hit the boat. The jib and forestay would sag to leeward
four to six inches and more. Any sag
more than a couple inches causes the jib to become increasingly
inefficient. The boat cannot point as
well and the boat heels excessively.
Next time you are aboard your boat, go out on the foredeck and push
against the forestay/jib (forestay if you do not have a roller furler). If there is more than a couple inches of sag,
the forestay (and in fact the whole rig) is not tuned up properly.
What follows is a tuning guide for Catalina 25’s that I
wrote for the Mainsheet magazine several years ago.. It is a good guide for any similarly rigged
boat. That is a boat with one forestay,
one backstay, an upper shroud on each side held away from the mast with a
spreader, and both forward lower shrouds and aft lower shrouds – eight wires
all together. If your boat has a
different set up, this guide might be a good place to start, but you will want
to check with your owner’s manual, owners association, or your favorite rigger.
Mast Tuning A Catalina 25
By Bill
Holcomb
Basic Concept
Over the past several years, there
have been many inquiries in both the Mainsheet magazine and on the C25/C250
website regarding the proper way to tune the mast on a Catalina 25. Here’s a step-by-step method to get your mast
tuned properly and keep it that way.
The basic idea of mast tuning is to
adjust the standing rigging (the stays and shrouds) in such a way so as to make
sure that the mast is vertical with regard to its starboard/port relationship
and raked forward or aft in such a way that proper feel on the helm is
achieved. From a practical point of
view, the mast will usually be straight up when the boat is floating on her
lines.
What You’re Working With
The Catalina 25 has eight wires that
support the mast and make up the standing rigging. These eight wires are:
The Forestay
The Backstay
The Two Upper Shrouds
The Two Forward Lower Shrouds
The Two Aft Lower Shrouds
Marine
eyes (swaged to the wires) attach these shrouds and stays to fittings on the
mast with clevis pins. The clevis pins
are secured with cotter pins or split rings.
Turnbuckles attach the shrouds and stays to fittings (chainplates and
stem fitting) at the stem, transom, and sides of the boat. Turnbuckles are rigging screws that have a
barrel in the middle of two screw in bolts.
One bolt end has left handed threads while the other has right-handed
threads. By turning the barrel, the
tension on the wire can be increased or decreased.
Safety
& Inspecting
It is very dangerous (not to mention
expensive) to have your mast collapse.
The mast is relatively heavy, hard and can do considerable damage to
anything it hits while falling. For this
reason, it is important to inspect the standing rigging at least annually. Make sure that the shrouds and stays don’t
have any little broken wires or rust.
Insure that all clevis pins are secured with either cotter pins or split
rings. Never use kinked wires or bent
turnbuckles. Replace immediately any
shrouds or stays that show bent, broken, or cracked swaged fittings.
How long does rigging last? That depends on how often the boat is used;
if the boat is raced, cruised or only day-sailed; how often the boat is
trailered; if the boat is stored outside during freezing weather; and many
other factors. Sometimes standing
rigging will last many years. Other
times, a turnbuckle bolt will become bent the first time the mast is raised and
will need to be replaced immediately for safety sake. At the very least though, the standing
rigging needs to be completely inspected annually and any part of the rig that
is not 100% needs to be immediately replaced before going out again.
Relative Tensions
Like everything that has to do with
sailboats, compromise and judgement are important factors when you are tuning
your rig. Some sailors don’t want to
“over-tension” the rig; others want to make sure that the rig is very tight;
and there are lots of folks who fall somewhere in between these extremes. However, the relative tension between the
shrouds and stays are as follows:
Forestay and Backstay have the
greatest tension
Upper Shrouds have nearly as much
tension as the forestay and backstay
Forward Lower Shrouds have less
tension than uppers, but more tension than Aft Lower Shrouds
OK, let’s get started with the mast raised and all of the
shrouds and stays loosely adjusted -
Start At the Dock:
Step One – Forestay/Backstay
Rake or Not
Rake Is The First Question –
Raking the mast (tipping it forward or aft from vertical) will directly
influence the feel of the helm.
Generally, raking the mast aft increases weather helm while raking the
mast forward reduces weather helm and can lead to lee helm. Most sailors like a little bit of weather
helm for the “feel” this give while steering.
Too much weather helm though makes steering the boat difficult and can
quickly tire out the boat steerer.
Adjust
the Forestay and Backstay – Start by using your main halyard’s headboard
shackle to make a plumb bob. Shackle the
headboard shackle to a large wrench or crescent wrench. Set the halyard so that the headboard
shackle/plumb-bob is at the level that the boom gooseneck will be while
sailing. If you want the mast straight
up and down, adjust the turnbuckles on the forestay and backstay until the plumb-bob
is just touching the back of the mast.
If you want the mast raked aft a couple inches, loosen the turnbuckle on
the forestay and tighten the turnbuckle on the backstay until the plumb bob is
the desired distance aft of the mast. Once the desired amount of mast rake has
been set, tighten the turnbuckles on both forestay and backstay one turn at a
time until the amount of tension you want is “dialed in”. Remember that these two wires need to have
the greatest tension; so, make sure that these two wires have considerable
tension. I know that this is vague, but
each rigger/skipper will have a different “feel” for this tension. Check other boats where you sail by pulling
on their forestays. Racers will often
have much more tension than daysailers.
Loos Gauge – There are shroud/stay tension
adjustment gauges available that will give you a numerical method to adjust the
wires. You can check with others to see
if your tensions are greater on less than the wires you are comparing to.
Step Two – Upper Shrouds
Adjust
the Upper Shrouds to insure that the mast is straight up with respect to
tipping either to port or starboard (left or right). The easy way to do this is to tape a steel
tape measure to your main halyard’s headboard shackle. Hoist the halyard and extend the tape measure
aloft. You can now measure the distance
from the masthead to the toe-rail outside the upper shroud chainplate with the
tape measure. Adjust the turnbuckles so
that you get the same measurement to both sides of the boat.
Now tension both turnbuckles so that
you end up with the mast straight up and nearly as much tension on the upper
shrouds as you have on the forestay/backstay.
Turn the turnbuckle barrels either one or ½ turn at a time until you get
the tension you want.
The Kerf is the slot in the back of the
mast. Your mainsail’s bolt rope or slugs
fit into the kerf so that the mainsail’s luff is fully supported by the
mast. By looking up the kerf you can see
if the mast is bending – either bowing or bending in an “S” - curve.
Step Three – Forward Lowers
Two
Considerations
that you have now are Is The Kerf Bent and
Do You Want To Pre-Bend The Mast.
Look up the Kerf to determine if the mast is bent, bowed or in an
“S”-curve. Usually, there will be a bow,
if anything. If you see one, increase
the tension on one of the forward lower shrouds until the bow has been
straightened out. Tension the opposite
side now to balance the previously tensioned forward lower shroud. At this point, the mast should be raked the
amount that you want and exactly straight up and down with relation to a
starboard/port lean.
The reason that you might want to
have “pre-bend” in the mast has to do with the amount of draft your mainsail
has. Another way to look at this is – If
your sails are old and “full” as opposed to newer and relatively “flat”, you
might want to pre-bend the mast forward in the middle so that some of the
fullness is pulled out for better upwind pointing.
If you decide to Pre-Bend the mast all you have to do is
increase the tension on both forward lower shroud turnbuckles until two or
three inches of bend is pulled into the middle of the mast. When you are done with this, your mast will
be bowed forward in the middle and when you hoist your mainsail, it will be
flatter than before and you’ll notice that you can sail higher on the wind than
before. Make sure that you sight up the
mast as you pre-bend it to make sure that you aren’t getting an “S” or a bow
left-right.
Step Four – Aft Lowers
The Aft Lowers balance the forward lowers, fine-tune the rig, and give
additional support to the mast. All you
need to do with the aft lowers is tighten the turnbuckles about one turn past
“finger-tight”. Sight up the kerf to
make sure that the mast is still straight.
With these steps complete at the
dock, it’s time to set sail and make your final adjustments.
Go Sailing -
Step Five – Fine Tuning
Fine
tuning the Rig is fairly easy. On a
day with moderate breezes in the 8 to 12 knot range sail the boat on a series
of upwind tacks. What your are looking
for is a couple of things:
That there isn’t too much slack in
the leeward (downwind) shrouds
That the jib luff doesn’t sag more that
a few inches in the puffs
That the kerf stays straight on both
starboard and port tacks.
Adjust the
shroud turnbuckles to fine tune the standing rigging. Remember that it’s OK to have a little bit of
slack in the leeward shrouds.
Step Six – Securing the Turnbuckles
When you get back to the dock, it’s
time to Recheck the Tensions and the
Alignment of the mast. First, check that the relationship in
tensions between the forestay/backstay and upper shrouds is still about the
same. The forestay/backstay should still
be slightly tighter than the uppers.
Next, secure your tape measure to your main halyard again and hoist the
tape aloft so that you can measure the distance from masthead to toe-rails
again. The measurement should be the
same to both starboard and port toe-rails.
Sight up the kerf again and make sure that the kerf forms a straight
line. Make the appropriate adjustments
to the turnbuckles.
When everything is set, you will
want to Secure the Turnbuckles so
that they won’t back themselves off and loosen the rigging. With closed barrel style turnbuckles, there
is a locking nut on both bolts. Turn
these nuts down to the barrel and use a small wrench to secure the nuts against
the barrel tightly. With open style
turnbuckles; use cotter pins, split rings, or seizing wire through the little
holes in the bolt ends that you can see in the openings of the barrel. The cotter pins, split rings, or seizing wire
will prevent the bolts from turning just like the locking nuts on the closed
barrel style.
Later
Step Seven
– Check the System
Over time, there is every chance
that your rig will loosen somewhat. This
may be due to sailing in strong winds, or to changes in temperature, or
combinations of other factors. At any
rate, you will want to periodically check your standing rigging from time to
time (at least annually) for tension and condition. Make your checks of the system both while at
the dock and while sailing.
As your sails age and get fuller,
you may want to pre-bend the mast (or pre-bend it more than you already
have). This will help your upwind
pointing ability and will decrease the amount of heel your boat develops in
stronger breezes (you won’t have to reef as soon).
As your sails age, you may feel as
if your boat is developing more weather helm.
If you’ve raked your mast aft, it may be time to adjust the rake forward
so that the mast is straight up instead of raked.
The combination of pre-band and mast
rake can change the weather helm feel of the boat; the boat’s pointing ability,
and the boat’s speed and efficiency through the water. So, don’t forget to check the standing rig
from time to time.